Installing a metal roof on your home is a fantastic way to enhance durability, energy efficiency, and aesthetic appeal. However, the process can seem daunting if you’re unfamiliar with it. This comprehensive guide will walk you through the essential steps, provide tips and insights, and ensure you feel confident in tackling this project. By the end, you’ll have a clear understanding of how to install metal roofing on your home.
Why Choose Metal Roofing?
Before diving into the installation process, it’s important to understand why metal roofing is a great option for your home. Metal roofs offer numerous benefits:
- Longevity: Metal roofs can last 40-70 years, depending on the material.
- Durability: They withstand extreme weather conditions, including heavy snow, hail, and high winds.
- Energy Efficiency: Metal roofs reflect solar radiant heat, which can reduce cooling costs by 10-25%.
- Environmentally Friendly: Many metal roofs are made from recycled materials and are fully recyclable at the end of their lifespan.
Tools and Materials Needed
To get started, you’ll need the following tools and materials:
- Measuring tape
- Chalk line
- Metal roofing panels
- Metal roofing screws
- Drill or driver
- Metal snips
- Ladder
- Safety harness and gear
- Underlayment
- Flashing
- Sealant
Preparation and Safety
Before beginning the installation, ensure you’re well-prepared and prioritize safety:
- Check Local Building Codes: Verify that your project complies with local regulations.
- Gather Permits: Obtain any necessary permits for roofing work.
- Safety Gear: Wear appropriate safety gear, including gloves, goggles, and a harness if working at heights.
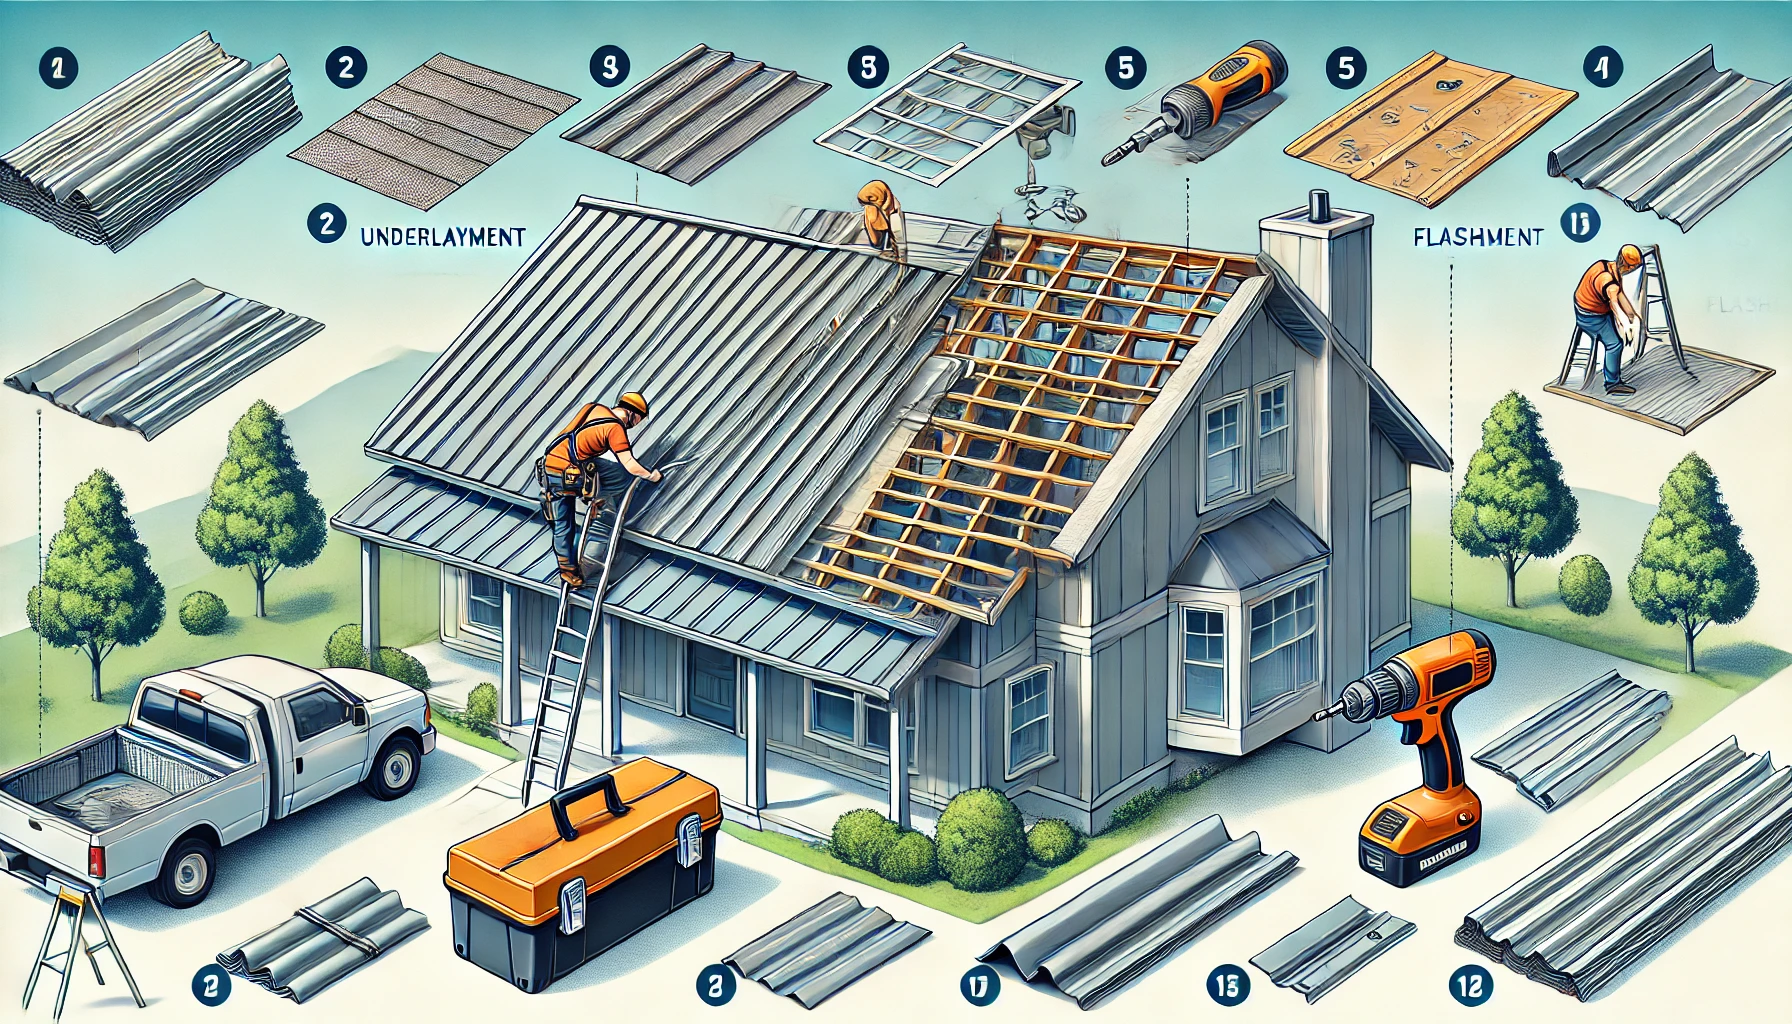
Step-by-Step Installation Guide
1. Measure Your Roof
Start by measuring your roof to determine how many metal panels you’ll need. Measure the length and width of each section of the roof and calculate the total square footage. Add a few extra panels to account for errors and waste.
2. Remove Old Roofing
If you’re replacing an old roof, remove the existing shingles or roofing material. Inspect the roof deck for any damage and make necessary repairs. Ensure the surface is clean and smooth before proceeding.
3. Install Underlayment
Lay down a layer of underlayment to provide a moisture barrier. Roll out the underlayment horizontally, starting at the bottom edge of the roof, and secure it with roofing nails or staples. Overlap each row by a few inches to ensure complete coverage.
4. Install Flashing
Next, install flashing around roof edges, valleys, and any protrusions such as chimneys or vents. Flashing prevents water from seeping into the roof deck and causing damage.
5. Lay the First Metal Panel
Begin laying the metal panels at the bottom corner of the roof. Align the first panel with the roof edge and secure it with metal roofing screws. Use the chalk line to ensure the panel is straight. Leave a small gap between panels to allow for thermal expansion.
6. Secure Subsequent Panels
Continue installing the metal panels, working your way across and up the roof. Overlap each panel by one ridge and use screws to secure them in place. Make sure the screws are properly driven into the raised portions of the panels to prevent leaks.
7. Cut Panels to Fit
When you reach the roof edges or obstacles like chimneys, use metal snips to cut the panels to fit. Measure carefully to ensure a precise fit and secure the cut panels with screws.
8. Install Ridge Cap
Once all the panels are in place, install the ridge cap along the roof peak. The ridge cap seals the roof and prevents water from entering at the highest point. Secure it with screws and ensure it overlaps both sides of the roof evenly.
9. Apply Sealant
Apply a high-quality sealant around any seams, flashing, and screw heads to prevent water infiltration. This step is crucial for ensuring the longevity and watertightness of your metal roof.
Maintenance Tips
While metal roofs are low-maintenance, regular inspections and minor upkeep can prolong their lifespan. Here are some maintenance tips:
- Inspect Annually: Check for loose screws, damaged panels, and signs of rust or corrosion.
- Clean Gutters: Ensure gutters are clean and free of debris to prevent water backup.
- Trim Overhanging Branches: Trim any tree branches that could scratch or damage the roof surface.
- Address Issues Promptly: Repair any damage or leaks as soon as they are detected to avoid further problems.
When considering how to install metal roofing on your home, it’s essential to understand the key benefits and follow a precise installation process. Metal roofing installation requires careful planning and the right materials to ensure a successful outcome. Durability, energy efficiency, and environmental benefits are some of the top reasons homeowners choose metal roofs. To achieve a perfect installation, you must follow the step-by-step guide, starting with accurate measurements, installing underlayment and flashing, and securing the metal panels properly. By doing so, you’ll enjoy the long-lasting benefits of a well-installed metal roof.
Conclusion
Installing a metal roof on your home may seem like a daunting task, but with the right tools, materials, and knowledge, it’s a manageable project that can significantly enhance your home’s value and efficiency. Remember to prioritize safety, follow each step carefully, and maintain your roof regularly to ensure its longevity. With these tips and guidelines, you’re well on your way to mastering how to install metal roofing on your home. Happy roofing!